Please note that the mandatory device activation procedure requires an active Internet connection on your computer. Activating an Antelope Audio device offline is not possible. Your Goliath must be activated online to work. This chapter contains the necessary instructions:
1. Connect the Goliath to a Windows or macOS computer.
3. Login to the Antelope Audio user area with your e-mail and password. If you don't have an account, visit https://en.antelopeaudio.com/sign-up/ to create one.
4. Click on the 'Activate New Device' button.
5. Click on Goliathfrom the device list.
6. Download and install the Antelope Launcher application for Windows or macOS
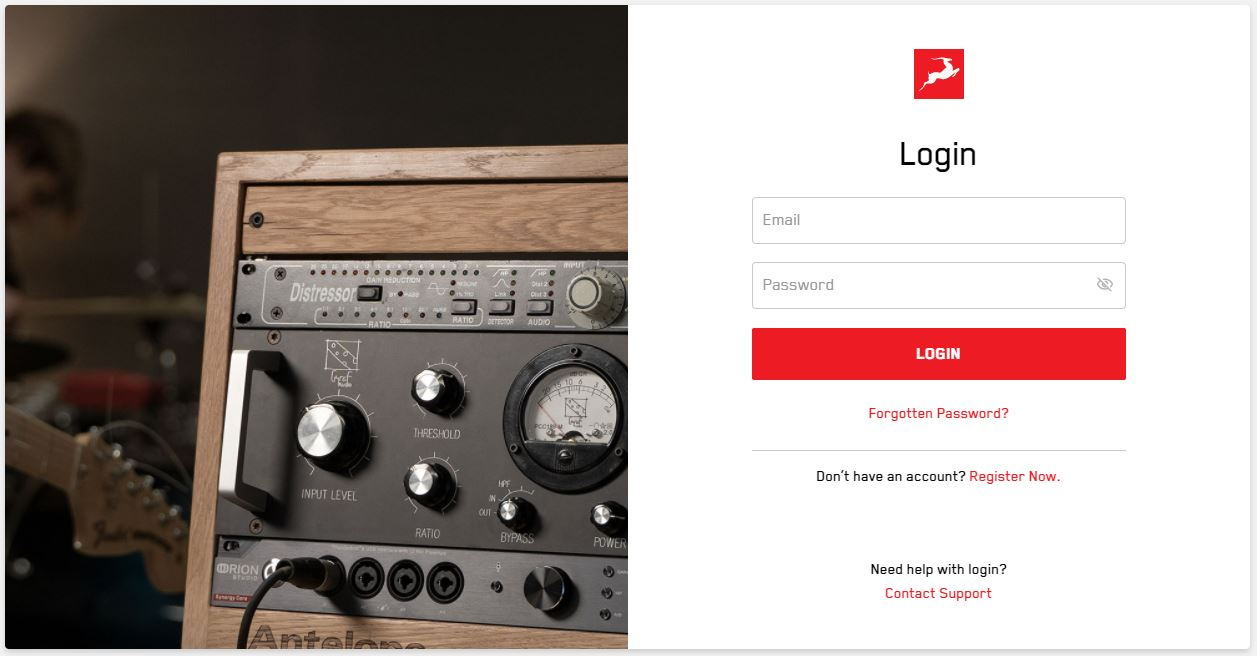
7. Open the Antelope Launcher application and click on the 'Login' button Enter the email and password you used to login into the Antelope Audio user area and click 'Login'.
8. Click on 'Activate'.
9. Upon successful activation, the final window will read ‘You have successfully activated
your device. Software is required to be installed and up to date for the device to be used.'
Click 'Software Installation' to go through the rest of the setup process or ‘Install Later’ if
you prefer to postpone this step. It is available later via the launcher’s Manage Device
menu.
The following warning message advises to power off or unplug any devices connected to
the interface to avoid any potential damage during the firmware installation
process. Click ‘Continue’ when ready and go through the instructions that follow.
After the installation is complete, you can proceed with the instructions for your operating
system and configure the interface for use with your Windows or macOS computer.
Note: The Goliath will be listed in the 'My Hardware' page of the Antelope Audio
user area with its serial number and activation date.
Windows 10
Configuring for Windows 10 Windows 10 needs a few tweaks to get the Goliathup and running:
1. Right-click the speaker icon in the system tray and choose ‘Open Sound settings’.
2. Make sure the Goliathis chosen under 'Output' and 'Input': • Under 'Output', the device should be listed as GoliathUSB Audio Driver Playback'. Note that this choice means you will only hear computer audio from the microphone's headphone output. If you use another audio device for listening, choose that one instead. • Under 'Input', the device should be listed as GoliathUSB Audio Driver Recording 1/2'.
3. Select the device and click Properties
Go to Advanced tab and make sure Default Format is set the same sample rate as your DAW,
For example if your DAW is at 48000 that would be 48KHz 2 Channels 24 bit.
Make sure you have selected 2 channels for Windows Audio Output settings of Default Format.
4. Enter the ‘Supported Formats’ tab and place checkmarks next to all the available sample rates except 32kHz.
5. Enter the ‘Enhancements’ tab and disable all enhancements.
6. Back in Sound settings, click 'Device Properties' under 'Input' and select the same sample rate for Default Format in Advanced Tab.
Then, click 'Additional Device Properties'. Enter the 'Enhancements' tab and disable all enhancements. Click 'OK' to close the window.
Tips
• If you are experiencing interruptions or failure when using your DAW and trying to playback audio from your OS at the same time, make sure that the device sample rate matches the one of your DAW session.
• In some cases, disabling the ‘Exclusive mode’ functionality from the ‘Advanced’ tabs might help when running multiple playback applications at the same time.
• Disabling the 32kHz sample rate isn’t mandatory, but it might help in general.
Configuring for macOS (10.14 and later) The security settings in macOS (10.14 and later) may result in no input signal reaching your DAW, despite having everything set up correctly.
These steps apply when you are using the Goliathin a DAW for the first time.
1. Launch your DAW and choose Goliath as the input device. The following dialog box will appear (if using Ableton Live 10 Suite, for example):
2. Click 'OK' and your DAW should function normally.
However, if the events above did not occur for some reason, or you are using multiple DAWs, you must do a manual tweak for each in 'Security & Privacy' settings:
Click the 'Apple' symbol and choose 'System Preferences'. Head to the 'Security & Privacy' settings menu
Then Click the 'Privacy' tab. In the column on the left, choose ‘Microphone’. Make sure there's a checkmark next to any DAW you want to use.
You may have to click the padlock symbol in the bottom left corner and enter your password to make changes.
If you are using MacOS Big Sur you would need to follow this guide to install Antelope Unified driver correctly.
Please refer to thisPlaylist with video guidance on how to setup your Antelope Audio interface.
DAW setup with Antelope Devices
This guide shows how to setup your DAW with your Antelope device
Please follow one of the videos below for your desired DAW:
Guide for ProTools
Guide for Ableton Live 10
Guide for Studio One
Guide for Logic Pro X
Guide for Cubase 10
Routing, Tracking and Monitoring
This video tutorial explains in depth how to route,track and monitor with Zen Tour Synergy Core, Orion Studio Synergy Core, Galaxy 32 Synergy Core, Galaxy 64 Synergy Core, Goliath HD Gen 3, Orion 32+ Gen3 and Orion 32HD Gen 3 and all related legacy devices.
Please note that the mandatory device activation procedure requires an active Internet connection on your computer. Activating an Antelope Audio device offline is not possible. Your Goliath HD must be activated online to work. This chapter contains the necessary instructions:
1. Connect the Goliath HD to a Windows or macOS computer.
3. Login to the Antelope Audio user area with your e-mail and password. If you don't have an account, visit https://en.antelopeaudio.com/sign-up/ to create one.
4. Click on the 'Activate New Device' button.
5. Click on Goliath HD from the device list.
6. Download and install the Antelope Launcher application for Windows or macOS
7. Open the Antelope Launcher application and click on the 'Login' button Enter the email and password you used to login into the Antelope Audio user area and click 'Login'.
8. Click on 'Activate'.
9. Upon successful activation, the final window will read ‘You have successfully activated
your device. Software is required to be installed and up to date for the device to be used.'
Click 'Software Installation' to go through the rest of the setup process or ‘Install Later’ if
you prefer to postpone this step. It is available later via the launcher’s Manage Device
menu.
The following warning message advises to power off or unplug any devices connected to
the interface to avoid any potential damage during the firmware installation
process. Click ‘Continue’ when ready and go through the instructions that follow.
After the installation is complete, you can proceed with the instructions for your operating
system and configure the interface for use with your Windows or macOS computer.
Note: The Goliath HD will be listed in the 'My Hardware' page of the Antelope Audio
user area with its serial number and activation date.
Windows 10
Configuring for Windows 10 Windows 10 needs a few tweaks to get the Goliath HD up and running:
1. Right-click the speaker icon in the system tray and choose ‘Open Sound settings’.
2. Make sure the Goliath HDis chosen under 'Output' and 'Input': • Under 'Output', the device should be listed as Goliath HD USB Audio Driver Playback'. Note that this choice means you will only hear computer audio from the microphone's headphone output. If you use another audio device for listening, choose that one instead. • Under 'Input', the device should be listed as Goliath HDUSB Audio Driver Recording 1/2'.
3. Select the device and click Properties
Go to Advanced tab and make sure Default Format is set the same sample rate as your DAW,
FFor example if your DAW is at 48000 that would be 48KHz 2 Channels 24 bit.
Make sure you have selected 2 channels for Windows Audio Output settings of Default Format !
4. Enter the ‘Supported Formats’ tab and place checkmarks next to all the available sample rates except 32kHz.
5. Enter the ‘Enhancements’ tab and disable all enhancements.
6. Back in Sound settings, click 'Device Properties' under 'Input' and select the same sample rate for Default Format in Advanced Tab.
Then, click 'Additional Device Properties'. Enter the 'Enhancements' tab and disable all enhancements. Click 'OK' to close the window.
Tips
• If you are experiencing interruptions or failure when using your DAW and trying to playback audio from your OS at the same time, make sure that the device sample rate matches the one of your DAW session.
• In some cases, disabling the ‘Exclusive mode’ functionality from the ‘Advanced’ tabs might help when running multiple playback applications at the same time.
• Disabling the 32kHz sample rate isn’t mandatory, but it might help in general.
Configuring for macOS (10.14 and later) The security settings in macOS (10.14 and later) may result in no input signal reaching your DAW, despite having everything set up correctly.
These steps apply when you are using the Goliath HD in a DAW for the first time.
1. Launch your DAW and choose Goliath HD as the input device. The following dialog box will appear (if using Ableton Live 10 Suite, for example):
2. Click 'OK' and your DAW should function normally.
However, if the events above did not occur for some reason, or you are using multiple
DAWs, you must do a manual tweak for each in 'Privacy & Security' settings:
1. Click the 'Apple' symbol and choose 'System Preferences'. Head to the 'Privacy & Security'
settings menu.
2. Make sure there's a checkmark next to any DAW you want to use.
Note: You may have to click the padlock symbol in the bottom left corner and enter your
password to make changes.
Please refer to thisPlaylist with video guidance on how to setup your Antelope Audio interface.
DAW setup with Antelope Devices
This guide shows how to setup your DAW with your Antelope device
Please follow one of the videos below for your desired DAW:
Guide for ProTools
Guide for Ableton Live 10
Guide for Studio One
Guide for Logic Pro X
Guide for Cubase 10
Routing, Tracking and Monitoring
This video tutorial explains in depth how to route,track and monitor with Zen Tour Synergy Core, Orion Studio Synergy Core, Galaxy 32 Synergy Core, Galaxy 64 Synergy Core, Goliath HD Gen 3, Orion 32+ Gen3 and Orion 32HD Gen 3 and all related legacy devices.
Please note that the mandatory device activation procedure requires an active internet connection on your computer. Activating an Antelope Audio device offline is not possible. Your Discrete 4 must be activated online to work. This chapter contains the necessary instructions:
1. Connect the Discrete 4 to a Windows or macOS computer.
3. Log in to the Antelope Audio user area with your email and password. If you don't have an account, visit https://en.antelopeaudio.com/sign-up/ to create one.
4. Click on the "Activate New Device" button.
5. Click on "Discrete 4" from the device list.
6. Download and install the Antelope Launcher application for Windows or macOS.
7. Open the Antelope Launcher application and click on the "Log-in" button (marked with red below):
Enter the email and password you used to login into the Antelope Audio user area in the website and click "Log in".
8. Click on "Activate".
9. Upon successful activation, the final window will read:
"You have successfully activated your device. Software is required to be installed and up to date for the device to be used".
Click on "Software Installation" to go through the rest of the setup process or if you would like to, click on "Install Later" if you prefer to postpone this step. The installation step is available later in the Antelope Launcher’s Manage Device section that you can find under your "DEVICE ID" (3rd box from left to right).
The following warning message advises to power off or unplug any devices connected to the interface to avoid any potential damage during the firmware installation process. Click on "Continue" when ready and go through the instructions that follow.
After the installation is complete, you can proceed with the instructions for your operating system and configure the interface for use with your Windows or macOS computer.
Note: The Discrete 4 will be listed on the "My Hardware" page of the Antelope Audio user area with it's serial number and activation date.
Configuring for Windows 10 needs a few tweaks to get the Discrete 4up and running.
1. Right-click the speaker icon in the system tray and choose "Open Sound settings".
2. Make sure the Discrete 4is chosen under "Output" and "Input"
Under "Output", the device should be listed as "Discrete 4 USB Audio Driver Playback". Note that this choice means you will only hear computer audio from the Discrete 4's monitor and headphone outputs. If you would like to use another audio device for playback (listening), choose that one instead.
Under "Input", the device should be listed as "Discrete 4USB Audio Driver Recording 1/2".
3. Select the device and click "Device Properties" under "Output" and then click to "Additional device properties".
Go to "Advanced" tab and make sure Default Format is set at the same sample rate as your DAW.
* If your DAW is at 48000kHz that would be 48kHz, 2 Channels, 24-bit.
* Make sure you have selected 2 channels for Windows Audio Output settings of Default Format
4. Go to the "Supported Formats" tab and place checkmarks next to all the available sample rates except 32kHz.
5. Enter the "Enhancements" tab and disable all enhancements.
6. Back in Sound settings, click "Device Properties"-> "Input" -> "Additional device properties" and select the same sample rates for "Default Format" in "Advanced" Tab.
After go to the "Enhancements" tab and disable all enhancements. Click "OK" to save the adjustments and close the window.
Tips:
If you are experiencing interruptions or failure when using your DAW and trying to playback audio from your OS (system audio like an audio file/YouTube video/Spotify) at the same time, make sure that the device sample rate matches the one of your DAW session.
In some cases, disabling the "Exclusive mode" functionality from the "Advanced" tabs might help when running multiple playback applications at the same time.
Disabling the 32kHz sample rate isn’t mandatory, but it might help in general.
For further instructions and optimization please refer to this guide:
The security settings in macOS (10.14 and later) may result in no input signal reaching your DAW, despite having everything set up correctly. These steps apply when you are using the Discrete 4 in a DAW for the first time.
1. Launch your DAW and choose "Discrete 4"as the input device. The following dialog box will appear (if using Ableton Live 10 Suite, for example):
2. Click "OK" and your DAW should function normally.
If the events above did not occur for some reason, or you are using multiple DAWs, you must manually adjust the settings for each in "Security & Privacy":
Click the "Apple" icon at the top-right corner of your display and choose "System Preferences". Head to the "Security & Privacy" settings menu. Then Click "Privacy" tab. In the column on the left, choose "Microphone". Make sure there is a checkmark next to any DAW you want to use.
You may have to click the padlock symbol in the bottom left corner and enter your password to make changes.
If you are using MacOS Big Sur, you would need to follow this guide to install the Antelope Unified driver correctly.
This video tutorial explains in depth how to route, track and monitor with Zen Go Synergy Core, Zen Q Synergy Core, Discrete 4, Discrete 4 Synergy Core, Discrete 8 and Discrete 8Synergy Core
Please note that the mandatory device activation procedure requires an active Internet connection on your computer. Activating an Antelope Audio device offline is not possible. Your Discrete 8 must be activated online to work. This chapter contains the necessary instructions:
1. Connect the Discrete 8 to a Windows or macOS computer.
3. Login to the Antelope Audio user area with your e-mail and password. If you don't have an account, visit https://en.antelopeaudio.com/sign-up/ to create one.
4. Click on the 'Activate New Device' button.
5. Click on Discrete 8 from the device list.
6. Download and install the Antelope Launcher application for Windows or macOS
7. Open the Antelope Launcher application and click on the 'Login' button Enter the email and password you used to login into the Antelope Audio user area and click 'Login'.
8. Click on 'Activate'.
9. Upon successful activation, the final window will read ‘You have successfully activated
your device. Software is required to be installed and up to date for the device to be used.'
Click 'Software Installation' to go through the rest of the setup process or ‘Install Later’ if
you prefer to postpone this step. It is available later via the launcher’s Manage Device
menu.
The following warning message advises to power off or unplug any devices connected to
the interface to avoid any potential damage during the firmware installation
process. Click ‘Continue’ when ready and go through the instructions that follow.
After the installation is complete, you can proceed with the instructions for your operating
system and configure the interface for use with your Windows or macOS computer.
Note: The Discrete 8 will be listed in the 'My Hardware' page of the Antelope Audio
user area with its serial number and activation date.
Windows 10
Configuring for Windows 10 Windows 10 needs a few tweaks to get the Discrete 8 up and running:
1. Right-click the speaker icon in the system tray and choose ‘Open Sound settings’.
2. Make sure the Discrete 8is chosen under 'Output' and 'Input': • Under 'Output', the device should be listed as Discrete 8 USB Audio Driver Playback'. Note that this choice means you will only hear computer audio from the microphone's headphone output. If you use another audio device for listening, choose that one instead. • Under 'Input', the device should be listed as Discrete 8USB Audio Driver Recording 1/2'.
3. Select the device and click Properties
Go to Advanced tab and make sure Default Format is set the same sample rate as your DAW,
For example if your DAW is at 48000 that would be 48KHz 2 Channels 24 bit.
Make sure you have selected 2 channels for Windows Audio Output settings of Default Format !
4. Enter the ‘Supported Formats’ tab and place checkmarks next to all the available sample rates except 32kHz.
5. Enter the ‘Enhancements’ tab and disable all enhancements.
6. Back in Sound settings, click 'Device Properties' under 'Input' and select the same sample rate for Default Format in Advanced Tab.
Then, click 'Additional Device Properties'. Enter the 'Enhancements' tab and disable all enhancements. Click 'OK' to close the window.
Tips
• If you are experiencing interruptions or failure when using your DAW and trying to playback audio from your OS at the same time, make sure that the device sample rate matches the one of your DAW session.
• In some cases, disabling the ‘Exclusive mode’ functionality from the ‘Advanced’ tabs might help when running multiple playback applications at the same time.
• Disabling the 32kHz sample rate isn’t mandatory, but it might help in general.
Configuring for macOS (10.14 and later) The security settings in macOS (10.14 and later) may result in no input signal reaching your DAW, despite having everything set up correctly.
These steps apply when you are using the Discrete 8 in a DAW for the first time.
1. Launch your DAW and choose Discrete 8 as the input device. The following dialog box will appear (if using Ableton Live 10 Suite, for example):
2. Click 'OK' and your DAW should function normally.
However, if the events above did not occur for some reason, or you are using multiple DAWs, you must do a manual tweak for each in 'Security & Privacy' settings:
Click the 'Apple' symbol and choose 'System Preferences'. Head to the 'Security & Privacy' settings menu
Then Click the 'Privacy' tab. In the column on the left, choose ‘Microphone’. Make sure there's a checkmark next to any DAW you want to use.
You may have to click the padlock symbol in the bottom left corner and enter your password to make changes.
If you are using MacOS Big Sur you would need to follow this guide to install Antelope Unified driver correctly.
Please refer to thisPlaylist with video guidance on how to setup your Antelope Audio interface.
DAW setup with Antelope Devices
This guide shows how to setup your DAW with your Antelope device
Please follow one of the videos below for your desired DAW:
Guide for ProTools
Guide for Ableton Live 10
Guide for Studio One
Guide for Logic Pro X
Guide for Cubase 10
Routing, Tracking and Monitoring
This video tutorial expalins in depth how to route,track and monitor with Zen Go Synergy Core, Zen Q Synergy Core, Discrete 4 Synergy Core and Discrete 8 Synergy Core
1. Connect to the AC power source via the back panel connector and the USB cable to an USB port on your computer. The Operating System will recognize the new HID-compliant device (MP8D).
2. Download and install the MP8D software control panel from www.antelopeaudio.com support/downloads. This will enable you to control your device from your computer and access all necessary settings.
3. Open your control panel by double-clicking the icon and follow the device activation procedure.
4. Connect your choice of inputs and outputs to MP8D.
Note: Make sure your device has the most recent firmware installed. Check this by selecting the Options panel and clicking on the Firmware Update button. See picture:
SETTING UP
Windows 10
Windows 10 needs a few tweaks to get the MP8D up and running:
1. Right-click the speaker icon in the system tray and click on ‘Open Sound settings’.
2. Make sure the MP8Dis chosen under 'Output' and 'Input': • Under 'Output', the device should be listed as MP8DUSB Audio Driver Playback'. Note that this choice means you will only hear computer audio from the microphone's headphone output. If you use another audio device for listening, choose that one instead.
• Under 'Input', the device should be listed as MP8DUSB Audio Driver Recording 1/2'.
3. Click on 'Device Properties' under 'Output'. Then, click 'Additional Device Properties'.
4. Enter the ‘Supported Formats’ tab and place checkmarks next to all the available sample rates except 32kHz.
5. Enter the ‘Enhancements’ tab and disable all enhancements.
6. Back in Sound settings, click 'Device Properties' under 'Input'. Then, click 'Additional Device Properties'. Enter the 'Enhancements' tab and disable all enhancements. Click 'OK' to close the window.
Tips
• If you are experiencing interruptions or failure when using your DAW and trying to playback audio from your OS at the same time, make sure that the device sample rate matches the one of your DAW session.
• In some cases, disabling the ‘Exclusive mode’ functionality from the ‘Advanced’ tabs might help when running multiple playback applications at the same time.
• Disabling the 32kHz sample rate isn’t mandatory, but it might help in general.
For further instructions and optimization please refer to this guide: Windows 10 Optimization
Mac OS
Configuring for macOS (10.14 and later) The security settings in macOS (10.14 and later) may result in no input signal reaching your DAW, despite having everything set up correctly.
These steps apply when you are using the MP8D in a DAW for the first time.
1. Launch your DAW and choose the MP8Das the input device. The following dialog box will appear (if using Ableton Live 10 Suite, for example):
2. Click 'OK' and your DAW should function normally.
However, if the events above did not occur for some reason, or you are using multiple DAWs, you must do a manual tweak for each in the MacOS 'Security & Privacy' settings:
Click the 'Apple' symbol and choose 'System Preferences'. Head to the 'Security & Privacy' settings menu
Then click on the 'Privacy' tab. In the column on the left, choose ‘Microphone’. Make sure there's a checkmark next to any DAW you want to use.
You may have to click the padlock symbol in the bottom left corner and enter your password to make changes.
If you are using macOS Big Sur or newer, follow those guides to install the Antelope Unified driver correctly.
Please refer to thisPlaylist with video guidance on how to set up your Antelope Audio interface.
DAW setup with Antelope Devices
This guide shows how to set up your DAW with your Antelope device
Please follow one of the videos below for your desired DAW:
Guide for Pro Tools
Guide for Ableton Live 10
Guide for Studio One
Guide for Logic Pro X
Guide for Cubase 10
Routing, Tracking, and Monitoring
This video tutorial explains in-depth how to route, track and monitor with Zen Tour Synergy Core, Orion Studio Synergy Core, Galaxy 32 Synergy Core, Galaxy 64 Synergy Core, Goliath HD Gen 3, Orion 32+ Gen3, and Orion 32HD Gen 3 and all related legacy devices.
1. Connect to the AC power source via the back panel connector and the USB cable to the USB port on your computer. The guest operating system will recognize the new HID-compliant device (Isochrone OCX).
2. Download and install the Isochrone OCX software control panel from this LINK. This will enable you to control your device from your computer and select all necessary settings.
3. Open your control panel by double-clicking the icon and follow the device activation procedure.
4. Connect your choice of inputs and outputs to the Isochrone OCX.
Note: Make sure your device has the most recent firmware installed. Check this by selecting the Options panel and clicking on the Firmware Update button. See picture:
1. Connect to the AC power source via the back panel connector and the USB cable to the USB port on your computer. The guest operating system will recognize the new HID-compliant device (Isochrone OCX - V).
2. Download and install the Isochrone OCX - Vsoftware control panel from this LINK. This will enable you to control your device from your computer and select all necessary settings.
3. Open your control panel by double-clicking the icon and follow the device activation procedure.
4. Connect your choice of inputs and outputs to Isochrone OCX - V.
Note: Make sure your device has the most recent firmware installed. Check this by selecting the Options panel and clicking on the Firmware Update button. See picture:
1. Connect to the AC power source via the back panel connector and the USB cable to the USB port on your computer. The guest operating system will recognize the new HID-compliant device (Audiophile 10M).
2. Download and install the Audiophile 10Msoftware control panel from this LINK. This will enable you to control your device from your computer and select all necessary settings.
3. Open your control panel by double-clicking the icon and follow the device activation procedure.
4. Connect your choice of inputs and outputs to Audiophile 10M.
Note: Make sure your device has the most recent firmware installed. Check this by selecting the Options panel and clicking on the Firmware Update button. See picture:
1. Connect to the AC power source via the back panel connector and the USB cable to the USB port on your computer. The guest operating system will recognize the new HID-compliant device (Zodiac Platinum).
2. Download and install the Zodiac Platinumsoftware control panel from this LINK. This will enable you to control your device from your computer and select all necessary settings.
3. Open your control panel by double-clicking the icon and follow the device activation procedure.
4. Connect your choice of inputs and outputs to Zodiac Platinum.
Note: Make sure your device has the most recent firmware installed. Check this by selecting the "options" panel and clicking on the "Firmware Update" button.
1. Connect to the AC power source via the back panel connector and the USB cable to the USB port on your computer. The guest operating system will recognize the new HID-compliant device (10M).
2. Download and install the 10M software control panel from www.antelopeaudio.com/en/ support/downloads This will enable you to control your device from your computer and select all necessary settings.
3. Open your control panel by double-clicking the icon and follow the device activation procedure.
4. Connect your choice of inputs and outputs to 10M.
Note: Make sure your device has the most recent firmware installed. Check this by selecting the Options panel and clicking on the Firmware Update button. See picture:
SETTING UP
Windows 10
Windows 10 needs a few tweaks to get the 10Mup and running:
1. Right-click the speaker icon in the system tray and choose ‘Open Sound settings’.
2. Make sure the 10Mis chosen under 'Output' and 'Input': • Under 'Output', the device should be listed as 10MUSB Audio Driver Playback'. Note that this choice means you will only hear computer audio from the microphone's headphone output. If you use another audio device for listening, choose that one instead. • Under 'Input', the device should be listed as 10MUSB Audio Driver Recording 1/2'.
4. Enter the ‘Supported Formats’ tab and place checkmarks next to all the available sample rates except 32kHz.
5. Enter the ‘Enhancements’ tab and disable all enhancements.
6. Back in Sound settings, click 'Device Properties' under 'Input'. Then, click 'Additional Device Properties'. Enter the 'Enhancements' tab and disable all enhancements. Click 'OK' to close the window.
Tips
• If you are experiencing interruptions or failure when using your DAW and trying to play back audio from your OS at the same time, make sure that the device sample rate matches the one of your DAW session.
• In some cases, disabling the ‘Exclusive mode’ functionality from the ‘Advanced’ tabs might help when running multiple playback applications at the same time.
• Disabling the 32kHz sample rate isn’t mandatory, but it might help in general.
For further instructions and optimization please refer to this guide: Windows 10 Optimization
Mac OS
Configuring for macOS (10.14 and later) The security settings on macOS (10.14 and later) may result in no input signal reaching your DAW, despite having everything set up correctly.
These steps apply when you are using the 10M in a DAW for the first time.
1. Launch your DAW and choose 10Mas the input device. The following dialog box will appear (if using Ableton Live 10 Suite, for example):
2. Click 'OK' and your DAW should function normally.
However, if the events above did not occur for some reason, or you are using multiple DAWs, you must do a manual tweak for each in 'Security & Privacy' settings:
Click the 'Apple' symbol and choose 'System Preferences'. Head to the 'Security & Privacy' settings menu
Then Click the 'Privacy' tab. In the column on the left, choose ‘Microphone’. Make sure there's a checkmark next to any DAW you want to use.
You may have to click the padlock symbol in the bottom left corner and enter your password to make changes.
If you are using macOS Big Sur follow this guide to install Antelope Unified driver correctly.
Please refer to thisplaylist with video guidance on how to set up your Antelope Audio interface.
DAW setup with Antelope Devices
This guide shows how to set up your DAW with your Antelope device
Please follow one of the videos below for your desired DAW:
Guide for ProTools
Guide for Ableton Live 10
Guide for Studio One
Guide for Logic Pro X
Guide for Cubase 10
Routing, Tracking, and Monitoring
This video tutorial explains in-depth how to route, track and monitor with Zen Tour Synergy Core, Orion Studio Synergy Core, Galaxy 32 Synergy Core, Galaxy 64 Synergy Core, Goliath HD Gen 3, Orion 32+ Gen3, and Orion 32HD Gen 3 and all related legacy devices.
1. Connect to the AC power source via the back panel connector and the USB cable to an USB port on your computer. The OS will recognize the new HID-compliant device (Eclipse 384).
This will enable you to control your device from your computer and select all necessary settings.
3. Open your control panel by double-clicking the icon and follow the device activation procedure.
4. Connect your choice of inputs and outputs to Eclipse 384.
Note: Make sure your device has the most recent firmware installed. Check this by selecting the Options panel and clicking on the 'Firmware Update' button. See picture:
SETTING UP
Windows 10
Windows 10 needs a few tweaks to get the Eclipse 384up and running:
1. Right-click the speaker icon in the system tray and choose ‘Open Sound settings’.
2. Make sure the Zen Studiois chosen under 'Output' and 'Input'
• Under 'Output', the device should be listed as Eclipse 384USB Audio Driver Playback'. Note that this choice means you will only hear computer audio from the microphone's headphone output. If you use another audio device for listening, choose that one instead.
• Under 'Input', the device should be listed as Eclipse 384USB Audio Driver Recording 1/2'.
4. Enter the ‘Supported Formats’ tab and place checkmarks next to all the available sample rates except 32kHz.
5. Enter the ‘Enhancements’ tab and disable all enhancements.
6. Back in Sound settings, click on 'Device Properties' under 'Input'. Then, click 'Additional Device Properties'. Enter the 'Enhancements' tab and disable all enhancements. Click 'OK' to close the window.
Tips
• If you are experiencing interruptions or failure when using your DAW and trying to playback audio from your OS at the same time, make sure that the device sample rate matches the one of your DAW session.
• In some cases, disabling the ‘Exclusive mode’ functionality from the ‘Advanced’ tabs might help when running multiple playback applications at the same time.
• Disabling the 32kHz sample rate isn’t mandatory, but it might help in general.
For further instructions and optimization please refer to this guide: Windows 10 Optimization
Mac OS
Configuring for macOS (10.14 and later) The security settings in macOS (10.14 and later) may result in no input signal reaching your DAW, despite having everything set up correctly.
These steps apply when you are using the Eclipse 384 in a DAW for the first time.
1. Launch your DAW and choose Eclipse 384as the input device. The following dialog box will appear (if using Ableton Live 10 Suite, for example):
2. Click 'OK' and your DAW should function normally.
However, if the events above did not occur for some reason, or you are using multiple DAWs, you must do a manual tweak for each in 'Security & Privacy' settings:
Click the 'Apple' symbol and choose 'System Preferences'. Head to the 'Security & Privacy' settings menu
Then Click the 'Privacy' tab. In the column on the left, choose ‘Microphone’. Make sure there's a checkmark next to any DAW you want to use.
You may have to click the padlock symbol in the bottom left corner and enter your password to make changes.
If you are using macOS Big Sur or newer, follow those guides to install Antelope Unified driver correctly.
Please refer to thisPlaylist with video guidance on how to set up your Antelope Audio interface.
DAW setup with Antelope Devices
This guide shows how to set up your DAW with your Antelope device
Please follow one of the videos below for your desired DAW:
Guide for Pro Tools
Guide for Ableton Live 10
Guide for Studio One
Guide for Logic Pro X
Guide for Cubase 10
Routing, Tracking, and Monitoring
This video tutorial explains in-depth how to route, track and monitor with Zen Tour Synergy Core, Orion Studio Synergy Core, Galaxy 32 Synergy Core, Galaxy 64 Synergy Core, Goliath HD Gen 3, Orion 32+ Gen3, and Orion 32HD Gen 3 and all related legacy devices:
1. Connect to the AC power source via the back panel connector and the USB cable to your computer's USB port. The operating system will recognize the new HID-compliant device (Zen Studio).
2. Download and install the Zen Studio software control panel from www.antelopeaudio.com/en/ support/downloads This will enable you to control your device from your computer and select all necessary settings.
3. Open your control panel by double-clicking the icon and follow the device activation procedure.
4. Connect your choice of inputs and outputs to Zen Studio.
Note: Make sure your device has the most recent firmware installed. Check this by selecting the Options panel and clicking on the Firmware Update button. See picture:
SETTING UP
Windows 10
Windows 10 needs a few tweaks to get the Zen Studio up and running:
1. Right-click the speaker icon in the system tray and choose ‘Open Sound settings’.
2. Make sure the Zen Studiois chosen under 'Output' and 'Input': • Under 'Output', the device should be listed as Zen StudioUSB Audio Driver Playback'. Note that this choice means you will only hear computer audio from the microphone's headphone output. If you use another audio device for listening, choose that one instead. • Under 'Input', the device should be listed as Zen StudioUSB Audio Driver Recording 1/2'.
3. Select the device and click 'Properties'
Go to Advanced tab and make sure Default Format is set the same sample rate as your DAW,
For example if your DAW is at 48000 that would be 48KHz 2 Channels 24 bit.
Make sure you have selected 2 channels for Windows Audio Output settings of Default Format!
4. Enter the ‘Supported Formats’ tab and check all the available sample rates except 32kHz.
5. Enter the ‘Enhancements’ tab and disable all enhancements.
6. Back in Sound settings, click 'Device Properties' under 'Input' and select the same sample rate for Default Format in Advanced Tab.
Then, click 'Additional Device Properties', enter the 'Enhancements' tab, and disable all enhancements. Click 'OK' to close the window.
Tips
• If you are experiencing interruptions or failure when using your DAW and trying to playback audio from your OS at the same time, make sure that the device sample rate matches the one of your DAW session.
• In some cases, disabling the ‘Exclusive mode’ functionality from the ‘Advanced’ tabs might help when running multiple playback applications at the same time.
• Disabling the 32kHz sample rate isn’t mandatory, but it might help in general.
Configuring for macOS (10.14 and later) The security settings in macOS (10.14 and later) may result in no input signal reaching your DAW, despite having everything set up correctly.
These steps apply when you are using the Zen Studio in a DAW for the first time.
1. Launch your DAW and choose Zen Studioas the input device. The following dialog box will appear (if using Ableton Live 10 Suite, for example):
2. Click 'OK' and your DAW should function normally.
However, if the events above did not occur for some reason, or you are using multiple DAWs, you must do a manual tweak for each in 'Security & Privacy' settings:
Click the 'Apple' symbol and choose 'System Preferences'. Head to the 'Security & Privacy' settings menu
Then Click the 'Privacy' tab. In the column on the left, choose ‘Microphone’. Make sure there's a checkmark next to any DAW you want to use.
You may have to click the padlock symbol in the bottom left corner and enter your password to make changes.
If you are using macOS Big Sur or newer, follow this guide to install Antelope Unified driver correctly.
Please refer to thisPlaylist with video guidance on how to set up your Antelope Audio interface.
DAW Setup with Antelope Devices
This guide shows how to set up your DAW with your Antelope device
Please follow one of the videos below for your desired DAW:
Guide for ProTools
Guide for Ableton Live 10
Guide for Studio One
Guide for Logic Pro X
Guide for Cubase 10
Routing, Tracking, and Monitoring
This video tutorial explains in-depth how to route, track and monitor with Zen Tour Synergy Core, Orion Studio Synergy Core, Galaxy 32 Synergy Core, Galaxy 64 Synergy Core, Goliath HD Gen 3, Orion 32+ Gen3, and Orion 32HD Gen 3 and all related legacy devices.
Please note that the mandatory device activation procedure requires an active Internet connection on your computer. Activating an Antelope Audio device offline is not possible. Your Zen Studio + must be activated online to work. This chapter contains the necessary instructions:
1. Connect the Zen Studio + to a Windows or macOS computer.
3. Login to the Antelope Audio user area with your e-mail and password. If you don't have an account, visit https://en.antelopeaudio.com/sign-up/ to create one.
4. Click on the 'Activate New Device' button.
5. Click on Zen Studio + from the device list.
6. Download and install the Antelope Launcher application for Windows or macOS
7. Open the Antelope Launcher application and click on the 'Login' button Enter the email and password you used to login into the Antelope Audio user area and click 'Login'.
8. Click on 'Activate device'.
Note: If the Zen Studio + does not appear in the 'Devices' tab, click on 'Not seeing your device?' and follow the on-screen instructions
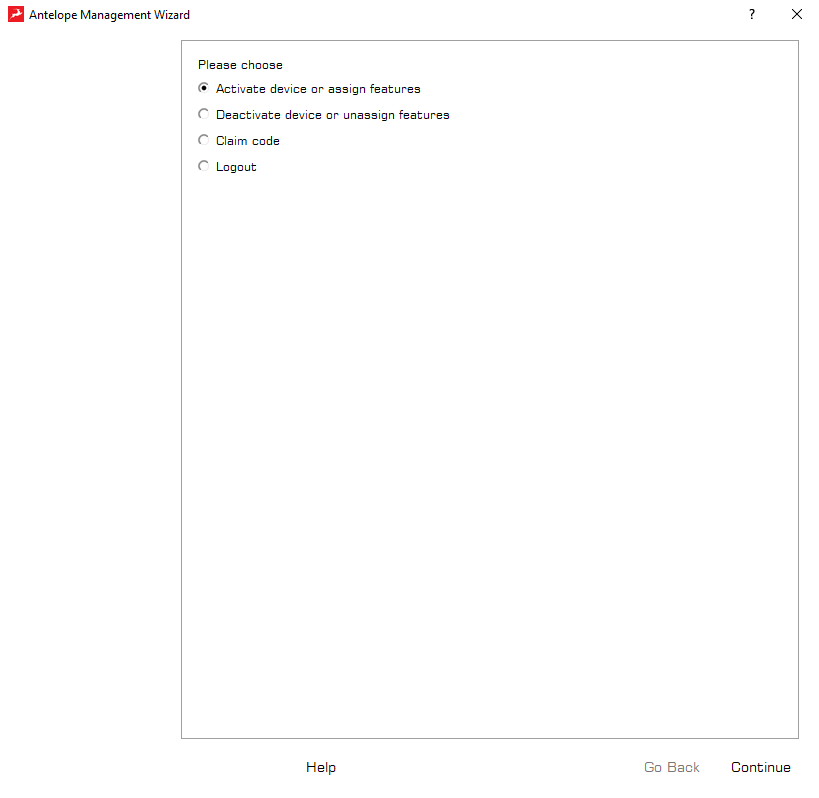
9. In the Antelope Management Wizard window, choose 'Activate device or assign features' and click 'Continue'. In the subsequent window, place a check mark next to 'Register device' and click 'Continue'
10. Upon successful activation, the final window will read 'Congratulations! You have successfully activated your device.' Click 'Done' and the activation is finished.
Please proceed with the 'Setting up after online activation is complete' chapter below to configure the Zen Studio + for use with your Windows or macOS computer.
Note: The Zen Studio +will be listed in the 'My Hardware' page of the Antelope Audio user area with its serial number and activation date
Setting up after online activation is complete
SETTING UP
After online activation is complete, please update the Zen Studio + to the latest bundle version available from the Antelope Launcher. To do this, simply open Antelope Launcher and click the 'Update' button below the 'Bundle Version' drop-down menu.
After the update is complete, you can proceed with the instructions for your operating system.
Windows 10
Configuring for Windows 10 Windows 10 needs a few tweaks to get the Zen Studio + up and running:
1. Right-click the speaker icon in the system tray and choose ‘Open Sound settings’.
2. Make sure the Zen Studio +is chosen under 'Output' and 'Input': • Under 'Output', the device should be listed as Zen Studio + USB Audio Driver Playback'. Note that this choice means you will only hear computer audio from the microphone's headphone output. If you use another audio device for listening, choose that one instead. • Under 'Input', the device should be listed as Zen Studio +USB Audio Driver Recording 1/2'.
3. Select the device and click Properties
Go to Advanced tab and make sure Default Format is set the same sample rate as your DAW,
For example if your DAW is at 48000 that would be 48KHz 2 Channels 24 bit.
Make sure you have selected 2 channels for Windows Audio Output settings of Default Format.
4. Enter the ‘Supported Formats’ tab and place checkmarks next to all the available sample rates except 32kHz.
5. Enter the ‘Enhancements’ tab and disable all enhancements.
6. Back in Sound settings, click 'Device Properties' under 'Input' and select the same sample rate for Default Format in Advanced Tab.
Then, click 'Additional Device Properties'. Enter the 'Enhancements' tab and disable all enhancements. Click 'OK' to close the window.
Tips
• If you are experiencing interruptions or failure when using your DAW and trying to playback audio from your OS at the same time, make sure that the device sample rate matches the one of your DAW session.
• In some cases, disabling the ‘Exclusive mode’ functionality from the ‘Advanced’ tabs might help when running multiple playback applications at the same time.
• Disabling the 32kHz sample rate isn’t mandatory, but it might help in general.
Configuring for macOS (10.14 and later) The security settings in macOS (10.14 and later) may result in no input signal reaching your DAW, despite having everything set up correctly.
These steps apply when you are using the Zen Studio + in a DAW for the first time.
1. Launch your DAW and choose Zen Studio +as the input device. The following dialog box will appear (if using Ableton Live 10 Suite, for example):
2. Click 'OK' and your DAW should function normally.
However, if the events above did not occur for some reason, or you are using multiple DAWs, you must do a manual tweak for each in 'Security & Privacy' settings:
Click the 'Apple' symbol and choose 'System Preferences'. Head to the 'Security & Privacy' settings menu
Then Click the 'Privacy' tab. In the column on the left, choose ‘Microphone’. Make sure there's a checkmark next to any DAW you want to use.
You may have to click the padlock symbol in the bottom left corner and enter your password to make changes.
If you are using MacOS Big Sur you would need to follow this guide to install Antelope Unified driver correctly.
Please refer to thisPlaylist with video guidance on how to setup your Antelope Audio interface.
DAW setup with Antelope Devices
This guide shows how to setup your DAW with your Antelope device
Please follow one of the videos below for your desired DAW:
Guide for ProTools
Guide for Ableton Live 10
Guide for Studio One
Guide for Logic Pro X
Guide for Cubase 10
Routing, Tracking and Monitoring
This video tutorial explains in depth how to route,track and monitor with Zen Tour Synergy Core, Orion Studio Synergy Core, Galaxy 32 Synergy Core, Galaxy 64 Synergy Core, Goliath HD Gen 3, Orion 32+ Gen3 and Orion 32HD Gen 3 and all related legacy devices.
Please note that the mandatory device activation procedure requires an active Internet connection on your computer. Activating an Antelope Audio device offline is not possible. Your Zen Tour must be activated online to work. This chapter contains the necessary instructions:
1. Connect the Zen Tourto a Windows or macOS computer.
3. Login to the Antelope Audio user area with your e-mail and password. If you don't have an account, visit https://en.antelopeaudio.com/sign-up/ to create one.
4. Click on the 'Activate New Device' button.
5. Click on Zen Tour from the device list.
6. Download and install the Antelope Launcher application for Windows or macOS
7. Open the Antelope Launcher application and click on the 'Login' button Enter the email and password you used to login into the Antelope Audio user area and click 'Login'.
8. Click on 'Activate'.
9. Upon successful activation, the final window will read ‘You have successfully activated
your device. Software is required to be installed and up to date for the device to be used.'
Click 'Software Installation' to go through the rest of the setup process or ‘Install Later’ if
you prefer to postpone this step. It is available later via the launcher’s Manage Device
menu.
The following warning message advises to power off or unplug any devices connected to
the interface to avoid any potential damage during the firmware installation
process. Click ‘Continue’ when ready and go through the instructions that follow.
After the installation is complete, you can proceed with the instructions for your operating
system and configure the interface for use with your Windows or macOS computer.
Note: The Zen Tour will be listed in the 'My Hardware' page of the Antelope Audio
user area with its serial number and activation date.
Windows 10
Configuring for Windows 10 Windows 10 needs a few tweaks to get the Zen Tour up and running:
1. Right-click the speaker icon in the system tray and choose ‘Open Sound settings’.
2. Make sure the Zen Touris chosen under 'Output' and 'Input': • Under 'Output', the device should be listed as Zen Tour USB Audio Driver Playback'. Note that this choice means you will only hear computer audio from the microphone's headphone output. If you use another audio device for listening, choose that one instead. • Under 'Input', the device should be listed as Zen TourUSB Audio Driver Recording 1/2'.
3. Select the device and click Properties
Go to Advanced tab and make sure Default Format is set the same sample rate as your DAW,
For example if your DAW is at 48000 that would be 48KHz 2 Channels 24 bit.
Make sure you have selected 2 channels for Windows Audio Output settings of Default Format !
4. Enter the ‘Supported Formats’ tab and place checkmarks next to all the available sample rates except 32kHz.
5. Enter the ‘Enhancements’ tab and disable all enhancements.
6. Back in Sound settings, click 'Device Properties' under 'Input' and select the same sample rate for Default Format in Advanced Tab.
Then, click 'Additional Device Properties'. Enter the 'Enhancements' tab and disable all enhancements. Click 'OK' to close the window.
Tips
• If you are experiencing interruptions or failure when using your DAW and trying to playback audio from your OS at the same time, make sure that the device sample rate matches the one of your DAW session.
• In some cases, disabling the ‘Exclusive mode’ functionality from the ‘Advanced’ tabs might help when running multiple playback applications at the same time.
• Disabling the 32kHz sample rate isn’t mandatory, but it might help in general.
Configuring for macOS (10.14 and later) The security settings in macOS (10.14 and later) may result in no input signal reaching your DAW, despite having everything set up correctly.
These steps apply when you are using the Zen Tour in a DAW for the first time.
1. Launch your DAW and choose Zen Tour as the input device. The following dialog box will appear (if using Ableton Live 10 Suite, for example):
2. Click 'OK' and your DAW should function normally.
However, if the events above did not occur for some reason, or you are using multiple
DAWs, you must do a manual tweak for each in 'Privacy & Security' settings:
1. Click the 'Apple' symbol and choose 'System Preferences'. Head to the 'Privacy & Security'
settings menu.
2. Make sure there's a checkmark next to any DAW you want to use.
Note: You may have to click the padlock symbol in the bottom left corner and enter your
password to make changes.
Please refer to thisPlaylist with video guidance on how to setup your Antelope Audio interface.
DAW setup with Antelope Devices
This guide shows how to setup your DAW with your Antelope device
Please follow one of the videos below for your desired DAW:
Guide for ProTools
Guide for Ableton Live 10
Guide for Studio One
Guide for Logic Pro X
Guide for Cubase 10
Routing, Tracking and Monitoring
This video tutorial explains in depth how to route,track and monitor with Zen Tour Synergy Core, Orion Studio Synergy Core, Galaxy 32 Synergy Core, Galaxy 64 Synergy Core, Goliath HD Gen 3, Orion 32+ Gen3 and Orion 32HD Gen 3 and all related legacy devices.
1. Connect to the AC power source via the back panel connector and the USB cable to the USB port on your computer. The guest operating system will recognize the new HID-compliant device (Zodiac Platinum).
2. Download and install the Zodiac Platinumsoftware control panel from this LINK. This will enable you to control your device from your computer and select all necessary settings.
3. Open your control panel by double-clicking the icon and follow the device activation procedure.
4. Connect your choice of inputs and outputs to Zodiac Platinum.
Note: Make sure your device has the most recent firmware installed. Check this by selecting the "options" panel and clicking on the "Firmware Update" button.
Configuring for Windows 10 needs a few tweaks to get the Discrete 4up and running.
1. Right-click the speaker icon in the system tray and choose "Open Sound settings".
2. Make sure the Discrete 4is chosen under "Output" and "Input"
Under "Output", the device should be listed as "Discrete 4 USB Audio Driver Playback". Note that this choice means you will only hear computer audio from the Discrete 4's monitor and headphone outputs. If you would like to use another audio device for playback (listening), choose that one instead.
Under "Input", the device should be listed as "Discrete 4USB Audio Driver Recording 1/2".
3. Select the device and click "Device Properties" under "Output" and then click to "Additional device properties".
Go to "Advanced" tab and make sure Default Format is set at the same sample rate as your DAW.
* If your DAW is at 48000kHz that would be 48kHz, 2 Channels, 24-bit.
* Make sure you have selected 2 channels for Windows Audio Output settings of Default Format
4. Go to the "Supported Formats" tab and place checkmarks next to all the available sample rates except 32kHz.
5. Enter the "Enhancements" tab and disable all enhancements.
6. Back in Sound settings, click "Device Properties"-> "Input" -> "Additional device properties" and select the same sample rates for "Default Format" in "Advanced" Tab.
After go to the "Enhancements" tab and disable all enhancements. Click "OK" to save the adjustments and close the window.
Tips:
If you are experiencing interruptions or failure when using your DAW and trying to playback audio from your OS (system audio like an audio file/YouTube video/Spotify) at the same time, make sure that the device sample rate matches the one of your DAW session.
In some cases, disabling the "Exclusive mode" functionality from the "Advanced" tabs might help when running multiple playback applications at the same time.
Disabling the 32kHz sample rate isn’t mandatory, but it might help in general.
The security settings in macOS (10.14 and later) may result in no input signal reaching your DAW, despite having everything set up correctly. These steps apply when you are using the Discrete 4 in a DAW for the first time.
1. Launch your DAW and choose "Discrete 4"as the input device. The following dialog box will appear (if using Ableton Live 10 Suite, for example):
2. Click 'OK' and your DAW should function normally.
2. Click "OK" and your DAW should function normally.
If the events above did not occur for some reason, or you are using multiple DAWs, you must manually adjust the settings for each in "Security & Privacy":
Click the "Apple" icon at the top-right corner of your display and choose "System Preferences". Head to the "Security & Privacy" settings menu. Then Click "Privacy" tab. In the column on the left, choose "Microphone". Make sure there is a checkmark next to any DAW you want to use.
You may have to click the padlock symbol in the bottom left corner and enter your password to make changes.
If you are using MacOS Big Sur, you would need to follow this guide to install the Antelope Unified driver correctly.
This video tutorial explains in depth how to route, track and monitor with Zen Go Synergy Core, Zen Q Synergy Core, Discrete 4, Discrete 4 Synergy Core, Discrete 8 and Discrete 8Synergy Core
Please note that the mandatory device activation procedure requires an active Internet connection on your computer. Activating an Antelope Audio device offline is not possible. Your Orion Studio must be activated online to work. This chapter contains the necessary instructions:
1. Connect the Orion Studio to a Windows or macOS computer.
3. Login to the Antelope Audio user area with your e-mail and password. If you don't have an account, visit https://en.antelopeaudio.com/sign-up/ to create one.
4. Click on the 'Activate New Device' button.
5. Click on Orion Studio from the device list.
6. Download and install the Antelope Launcher application for Windows or macOS
7. Open the Antelope Launcher application and click on the 'Login' button Enter the email and password you used to log in into the Antelope Audio user area and click 'Login'.
8. Click on 'Activate device'.
Note: If the Orion Studio does not appear in the 'Devices' tab, click on 'Not seeing your device?' and follow the on-screen instructions
9. In the Antelope Management Wizard window, choose 'Activate device or assign features' and click 'Continue'. In the subsequent window, place a check mark next to 'Register device' and click 'Continue'
10. Upon successful activation, the final window will read 'Congratulations! You have successfully activated your device.' Click 'Done' and the activation is finished.
Please proceed with the 'Setting up after online activation is complete' chapter below to configure the Orion Studio for use with your Windows or macOS computer.
Note: The Orion Studio will be listed in the 'My Hardware' page of the Antelope Audio user area with its serial number and activation date
Setting up after online activation is complete
SETTING UP
After online activation is complete, please update the Orion Studio to the latest bundle version available from the Antelope Launcher. To do this, simply open Antelope Launcher and click the 'Update' button below the 'Bundle Version' drop-down menu.
After the update is complete, you can proceed with the instructions for your operating system.
Windows 10
Configuring for Windows 10 Windows 10 needs a few tweaks to get the Orion Studio up and running:
1. Right-click the speaker icon in the system tray and choose ‘Open Sound settings’.
2. Make sure the Orion Studio is chosen under 'Output' and 'Input': • Under 'Output', the device should be listed as Orion Studio USB Audio Driver Playback. Note that this choice means you will only hear computer audio from the microphone's headphone output. If you use another audio device for listening, choose that one instead. • Under 'Input', the device should be listed as Orion Studio USB Audio Driver Recording 1/2'.
3. Select the device and click Properties
Go to Advanced tab and make sure Default Format is set the same sample rate as your DAW,
For example if your DAW is at 48000 that would be 48KHz 2 Channels 24 bit.
Make sure you have selected 2 channels for Windows Audio Output settings of Default Format !
4. Enter the ‘Supported Formats’ tab and place checkmarks next to all the available sample rates except 32kHz.
5. Enter the ‘Enhancements’ tab and disable all enhancements.
6. Back in Sound settings, click 'Device Properties' under 'Input' and select the same sample rate for Default Format in Advanced Tab.
Then, click 'Additional Device Properties'. Enter the 'Enhancements' tab and disable all enhancements. Click 'OK' to close the window.
Tips
• If you are experiencing interruptions or failure when using your DAW and trying to play back audio from your OS at the same time, make sure that the device sample rate matches the one of your DAW session.
• In some cases, disabling the ‘Exclusive mode’ functionality from the ‘Advanced’ tabs might help when running multiple playback applications at the same time.
• Disabling the 32kHz sample rate isn’t mandatory, but it might help in general.
Configuring for macOS (10.14 and later) The security settings on macOS (10.14 and later) may result in no input signal reaching your DAW, despite having everything set up correctly.
These steps apply when you are using the Orion Studio in a DAW for the first time.
1. Launch your DAW and choose Orion Studio as the input device. The following dialog box will appear (if using Ableton Live 10 Suite, for example):
2. Click 'OK' and your DAW should function normally.
However, if the events above did not occur for some reason, or you are using multiple DAWs, you must do a manual tweak for each in 'Security & Privacy' settings:
Click the 'Apple' symbol and choose 'System Preferences'. Head to the 'Security & Privacy' settings menu
Then click the 'Privacy' tab. In the column on the left, choose ‘Microphone’. Make sure there's a checkmark next to any DAW you want to use.
You may have to click the padlock symbol in the bottom left corner and enter your password to make changes.
If you are using macOS Big Sur you would need to follow this guide to install Antelope Unified driver correctly.
Please refer to thisplaylist with video guidance on how to set up your Antelope Audio interface.
DAW setup with Antelope Devices
This guide shows how to set up your DAW with your Antelope device
Please follow one of the videos below for your desired DAW:
Guide for ProTools
Guide for Ableton Live 10
Guide for Studio One
Guide for Logic Pro X
Guide for Cubase 10
Routing, Tracking and Monitoring
This video tutorial explains in depth how to route, track and monitor with Zen Tour Synergy Core, Orion Studio Synergy Core, Galaxy 32 Synergy Core, Galaxy 64 Synergy Core, Goliath HD Gen 3, Orion 32+ Gen3 and Orion 32HD Gen 3 and all related legacy devices.
Please note that the mandatory device activation procedure requires an active Internet connection on your computer. Activating an Antelope Audio device offline is not possible. Your Orion Studio HD must be activated online to work. This chapter contains the necessary instructions:
1. Connect the Orion Studio HD to a Windows or macOS computer.
3. Login to the Antelope Audio user area with your e-mail and password. If you don't have an account, visit https://en.antelopeaudio.com/sign-up/ to create one.
4. Click on the 'Activate New Device' button.
5. Click on the Orion Studio HD from the device list.
6. Download and install the Antelope Launcher application for Windows or macOS
7. Open the Antelope Launcher application and click on the 'Login' button Enter the email and password you used to login into the Antelope Audio user area and click 'Login'.
8. Click on 'Activate device'.
Note: If the Orion Studio HD does not appear in the 'Devices' tab, click on 'Not seeing your device?' and follow the on-screen instructions
9. In the Antelope Management Wizard window, choose 'Activate device or assign features' and click 'Continue'. In the subsequent window, place a check mark next to 'Register device' and click 'Continue'
10. Upon successful activation, the final window will read 'Congratulations! You have successfully activated your device.' Click 'Done' and the activation is finished.
Please proceed with the 'Setting up after online activation is complete' chapter below to configure the Orion Studio HD for use with your Windows or macOS computer.
Note: The Orion Studio HDwill be listed in the 'My Hardware' page of the Antelope Audio user area with its serial number and activation date
Setting up after online activation is complete
SETTING UP
After online activation is complete, please update the Orion Studio HD to the latest bundle version available from the Antelope Launcher. To do this, simply open the Antelope Launcher and Click "Install" near the Orion Studio HD
After the update is complete, you can proceed with the instructions for your operating system.
Windows 10
Configuring for Windows 10 Windows 10 needs a few tweaks to get the Orion Studio HD up and running:
1. Right-click the speaker icon in the system tray and choose ‘Open Sound settings’.
2. Make sure the Orion Studio HDis chosen under 'Output' and 'Input'
• Under 'Output', the device should be listed as Orion Studio HD USB Audio Driver Playback'. Note that this choice means you will only hear computer audio from the microphone's headphone output. If you use another audio device for listening, choose that one instead.
• Under 'Input', the device should be listed as Orion Studio HDUSB Audio Driver Recording 1/2'.
3. Select the device and click "Properties"
Go to the 'Advanced' tab and make sure that the Default Format is set the same sample rate as your DAW,
For example if your DAW is at 48000 that would be 48KHz 2 Channels 24 bit.
Make sure you have selected 2 channels for Windows Audio Output settings of Default Format !
4. Enter the ‘Supported Formats’ tab and place checkmarks next to all the available sample rates except 32kHz.
5. Enter the ‘Enhancements’ tab and disable all enhancements.
6. Back in Sound settings, click 'Device Properties' under 'Input' and select the same sample rate for Default Format in Advanced Tab.
Then, click 'Additional Device Properties'. Enter the 'Enhancements' tab and disable all enhancements. Click 'OK' to close the window.
Tips
• If you are experiencing interruptions or failure when using your DAW and trying to playback audio from your OS at the same time, make sure that the device sample rate matches the one of your DAW session.
• In some cases, disabling the ‘Exclusive mode’ functionality from the ‘Advanced’ tabs might help when running multiple playback applications at the same time.
• Disabling the 32kHz sample rate isn’t mandatory, but it might help in general.
The security settings in macOS (10.14 and later) may result in no input signal reaching your DAW, despite having everything set up correctly.
These steps apply when you are using the Orion Studio HD in a DAW for the first time.
1. Launch your DAW and choose the Orion Studio HD as the input device. The following dialog box will appear (if using Ableton Live 10 Suite, for example):
2. Click 'OK' and your DAW should function normally.
However, if the events above did not occur for some reason, or you are using multiple DAWs, you must do a manual tweak for each in the MacOS 'Security & Privacy' settings:
Click the 'Apple' symbol and choose 'System Preferences'. Head to the 'Security & Privacy' settings menu
Then Click on the 'Privacy' tab. In the column on the left, choose ‘Microphone’. Make sure there's a checkmark next to any DAW you want to use.
You may have to click the padlock symbol in the bottom left corner and enter your password to make changes.
If you are using MacOS Big Sur or newer, you would need to follow those guides to install Antelope Unified driver correctly.
Please refer to thisPlaylist with video guidance on how to setup your Antelope Audio interface.
DAW setup with Antelope Devices
This guide shows how to setup your DAW with your Antelope device
Please follow one of the videos below for your desired DAW:
Guide for Pro Tools
Guide for Ableton Live 10
Guide for Studio One
Guide for Logic Pro X
Guide for Cubase 10
Routing, Tracking and Monitoring
This video tutorial explains in depth how to route, track and monitor with Zen Tour Synergy Core, Orion Studio Synergy Core, Galaxy 32 Synergy Core, Galaxy 64 Synergy Core, Goliath HD Gen 3, Orion 32+ Gen3 and Orion 32HD Gen 3 and all related legacy devices.
Please note that the mandatory device activation procedure requires an active Internet connection on your computer. Activating an Antelope Audio device offline is not possible. Your Orion Studio 2017 must be activated online to work. This chapter contains the necessary instructions:
1. Connect the Orion Studio 2017 to a Windows or macOS computer.
3. Log in to the Antelope Audio user area with your e-mail and password. If you don't have an account, visit https://en.antelopeaudio.com/sign-up/ to create one.
4. Click on the 'Activate New Device' button.
5. Click on Orion Studio 2017 from the device list.
6. Download and install the Antelope Launcher application for Windows or macOS
7. Open the Antelope Launcher application and click on the 'Login' button Enter the email and password you used to log in into the Antelope Audio user area and click 'Login'.
8. Click on 'Activate device'.
Note: If the Orion Studio 2017 does not appear in the 'Devices' tab, click on 'Not seeing your device?' and follow the on-screen instructions
9. In the Antelope Management Wizard window, choose 'Activate device or assign features' and click 'Continue'. In the subsequent window, place a checkmark next to 'Register device' and click 'Continue'
10. Upon successful activation, the final window will read 'Congratulations! You have successfully activated your device.' Click 'Done' and the activation is finished.
Please proceed with the chapter below to configure the Orion Studio 2017 for use with your Windows or macOS computer.
Note: The Orion Studio 2017will be listed in the 'My Hardware' page of the Antelope Audio user area with its serial number and activation date
Setting up after online activation is complete
SETTING UP
After online activation is complete, please update the Orion Studio 2017 to the latest bundle version available from the Antelope Launcher. To do this, simply open Antelope Launcher and click the 'Update' button below the 'Bundle Version' drop-down menu.
After the update is complete, you can proceed with the instructions for your operating system.
Windows 10
Configuring for Windows 10 Windows 10 needs a few tweaks to get the Orion Studio 2017 up and running:
1. Right-click the speaker icon in the system tray and choose ‘Open Sound settings’.
2. Make sure the Orion Studio 2017is chosen under 'Output' and 'Input': • Under 'Output', the device should be listed as Orion Studio 2017 USB Audio Driver Playback'. Note that this choice means you will only hear computer audio from the microphone's headphone output. If you use another audio device for listening, choose that one instead. • Under 'Input', the device should be listed as Orion Studio 2017USB Audio Driver Recording 1/2'.
3. Select the device and click Properties
Go to 'Advanced' tab and make sure Default Format is set to the same sample rate as your DAW,
For example, if your DAW is at 48,000 that would be 48KHz 2 Channels 24 bit.
Make sure you have selected 2 channels for Windows Audio Output settings of Default Format!
4. Enter the ‘Supported Formats’ tab and place checkmarks next to all the available sample rates except 32kHz.
5. Enter the ‘Enhancements’ tab and disable all enhancements.
6. Back in Sound settings, click 'Device Properties' under 'Input' and select the same sample rate for Default Format in Advanced Tab.
Then, click 'Additional Device Properties'. Enter the 'Enhancements' tab and disable all enhancements. Click 'OK' to close the window.
Tips
• If you are experiencing interruptions or failure when using your DAW and trying to playback audio from your OS at the same time, make sure that the device sample rate matches the one of your DAW session.
• In some cases, disabling the ‘Exclusive mode’ functionality from the ‘Advanced’ tabs might help when running multiple playback applications at the same time.
• Disabling the 32kHz sample rate isn’t mandatory, but it might help in general.
Configuring for macOS (10.14 and later) The security settings in macOS (10.14 and later) may result in no input signal reaching your DAW, despite having everything set up correctly.
These steps apply when you are using the Orion Studio 2017 in a DAW for the first time.
1. Launch your DAW and choose Orion Studio HD as the input device. The following dialog box will appear (if using Ableton Live 10 Suite, for example):
2. Click 'OK' and your DAW should function normally.
However, if the events above did not occur for some reason, or you are using multiple DAWs, you must do a manual tweak for each in 'Security & Privacy' settings:
Click the 'Apple' symbol and choose 'System Preferences'. Head to the 'Security & Privacy' settings menu
Then click the 'Privacy' tab. In the column on the left, choose ‘Microphone’. Make sure there's a checkmark next to any DAW you want to use.
You may have to click the padlock symbol in the bottom left corner and enter your password to make changes.
If you are using macOS Big Sur you would need to follow this guide to install Antelope Unified driver correctly.
Please refer to thisPlaylist with video guidance on how to set up your Antelope Audio interface.
DAW setup with Antelope Devices
This guide shows how to set up your DAW with your Antelope device
Please follow one of the videos below for your desired DAW:
Guide for ProTools
Guide for Ableton Live 10
Guide for Studio One
Guide for Logic Pro X
Guide for Cubase 10
Routing, Tracking, and Monitoring
This video tutorial explains in depth how to route,track and monitor with Zen Tour Synergy Core, Orion Studio Synergy Core, Galaxy 32 Synergy Core, Galaxy 64 Synergy Core, Goliath HD Gen 3, Orion 32+ Gen3 and Orion 32HD Gen 3 and all related legacy devices.
1. Connect to the AC power source via the back panel connector and the USB cable to the USB port on your computer. The guest operating system will recognize the new HID-compliant device (Orion 32).
2. Download and install the Orion 32 software control panel from www.antelopeaudio.com/en/ support/downloads This will enable you to control your device from your computer and select all necessary settings.
3. Open your control panel by double-clicking the icon and follow the device activation procedure.
4. Connect your choice of inputs and outputs to Orion 32.
Note: Make sure your device has the most recent firmware installed. Check this by selecting the Options panel and clicking on the Firmware Update button. See picture:
SETTING UP
Windows 10
Windows 10 needs a few tweaks to get the Orion 32up and running:
1. Right-click the speaker icon in the system tray and choose ‘Open Sound settings’.
2. Make sure the Zen Studiois chosen under 'Output' and 'Input': • Under 'Output', the device should be listed as Orion 32USB Audio Driver Playback'. Note that this choice means you will only hear computer audio from the microphone's headphone output. If you use another audio device for listening, choose that one instead. • Under 'Input', the device should be listed as Orion 32USB Audio Driver Recording 1/2'.
3. Select the device and click Properties
Go to Advanced tab and make sure Default Format is set the same sample rate as your DAW,
For example if your DAW is at 48000 that would be 48KHz 2 Channels 24 bit.
Make sure you have selected 2 channels for Windows Audio Output settings of Default Format.
4. Enter the ‘Supported Formats’ tab and place checkmarks next to all the available sample rates except 32kHz.
5. Enter the ‘Enhancements’ tab and disable all enhancements.
6. Back in Sound settings, click 'Device Properties' under 'Input' and select the same sample rate for Default Format in Advanced Tab.
Then, click 'Additional Device Properties'. Enter the 'Enhancements' tab and disable all enhancements. Click 'OK' to close the window.
Tips
• If you are experiencing interruptions or failure when using your DAW and trying to playback audio from your OS at the same time, make sure that the device sample rate matches the one of your DAW session.
• In some cases, disabling the ‘Exclusive mode’ functionality from the ‘Advanced’ tabs might help when running multiple playback applications at the same time.
• Disabling the 32kHz sample rate isn’t mandatory, but it might help in general.
Configuring for macOS (10.14 and later) The security settings in macOS (10.14 and later) may result in no input signal reaching your DAW, despite having everything set up correctly.
These steps apply when you are using the Orion 32 in a DAW for the first time.
1. Launch your DAW and choose Orion 32as the input device. The following dialog box will appear (if using Ableton Live 10 Suite, for example):
2. Click 'OK' and your DAW should function normally.
However, if the events above did not occur for some reason, or you are using multiple DAWs, you must do a manual tweak for each in 'Security & Privacy' settings:
Click the 'Apple' symbol and choose 'System Preferences'. Head to the 'Security & Privacy' settings menu
Then Click the 'Privacy' tab. In the column on the left, choose ‘Microphone’. Make sure there's a checkmark next to any DAW you want to use.
You may have to click the padlock symbol in the bottom left corner and enter your password to make changes.
If you are using macOS Big Sur follow this guide to install Antelope Unified driver correctly.
Please refer to thisPlaylist with video guidance on how to set up your Antelope Audio interface.
DAW setup with Antelope Devices
This guide shows how to set up your DAW with your Antelope device
Please follow one of the videos below for your desired DAW:
Guide for ProTools
Guide for Ableton Live 10
Guide for Studio One
Guide for Logic Pro X
Guide for Cubase 10
Routing, Tracking, and Monitoring
This video tutorial explains in-depth how to route, track and monitor with Zen Tour Synergy Core, Orion Studio Synergy Core, Galaxy 32 Synergy Core, Galaxy 64 Synergy Core, Goliath HD Gen 3, Orion 32+ Gen3, and Orion 32HD Gen 3 and all related legacy devices.
Please note that the mandatory device activation procedure requires an active Internet connection on your computer. Activating an Antelope Audio device offline is not possible. Your Orion 32HD must be activated online to work. This chapter contains the necessary instructions:
1. Connect the Orion 32HD to a Windows or macOS computer.
3. Login to the Antelope Audio user area with your e-mail and password. If you don't have an account, visit https://en.antelopeaudio.com/sign-up/ to create one.
4. Click on the 'Activate New Device' button.
5. Click on Orion 32HD from the device list.
6. Download and install the Antelope Launcher application for Windows or macOS
7. Open the Antelope Launcher application and click on the 'Login' button Enter the email and password you used to login into the Antelope Audio user area and click 'Login'.
8. Click on 'Activate device'.
Note: If the Orion 32HD does not appear in the 'Devices' tab, click on 'Not seeing your device?' and follow the on-screen instructions
9. In the Antelope Management Wizard window, choose 'Activate device or assign features' and click 'Continue'. In the subsequent window, place a check mark next to 'Register device' and click 'Continue'
10. Upon successful activation, the final window will read 'Congratulations! You have successfully activated your device.' Click 'Done' and the activation is finished.
Please proceed with the 'Setting up after online activation is complete' chapter below to configure the Orion 32HD for use with your Windows or macOS computer.
Note: The Orion 32HDwill be listed in the 'My Hardware' page of the Antelope Audio user area with its serial number and activation date
Setting up after online activation is complete
SETTING UP
After online activation is complete, please update the Orion 32HD to the latest bundle version available from the Antelope Launcher. To do this, simply open Antelope Launcher and click the 'Update' button below the 'Bundle Version' drop-down menu.
After the update is complete, you can proceed with the instructions for your operating system.
Windows 10
Configuring for Windows 10 Windows 10 needs a few tweaks to get the Orion 32HD up and running:
1. Right-click the speaker icon in the system tray and choose ‘Open Sound settings’.
2. Make sure the Orion 32HD is chosen under 'Output' and 'Input': • Under 'Output', the device should be listed as Orion 32HD USB Audio Driver Playback'. Note that this choice means you will only hear computer audio from the microphone's headphone output. If you use another audio device for listening, choose that one instead. • Under 'Input', the device should be listed as Orion 32HD USB Audio Driver Recording 1/2'.
3. Select the device and click Properties
Go to Advanced tab and make sure Default Format is set the same sample rate as your DAW,
For example if your DAW is at 48000 that would be 48KHz 2 Channels 24 bit.
Make sure you have selected 2 channels for Windows Audio Output settings of Default Format !
4. Enter the ‘Supported Formats’ tab and place checkmarks next to all the available sample rates except 32kHz.
5. Enter the ‘Enhancements’ tab and disable all enhancements.
6. Back in Sound settings, click 'Device Properties' under 'Input' and select the same sample rate for Default Format in Advanced Tab.
Then, click 'Additional Device Properties'. Enter the 'Enhancements' tab and disable all enhancements. Click 'OK' to close the window.
Tips
• If you are experiencing interruptions or failure when using your DAW and trying to playback audio from your OS at the same time, make sure that the device sample rate matches the one of your DAW session.
• In some cases, disabling the ‘Exclusive mode’ functionality from the ‘Advanced’ tabs might help when running multiple playback applications at the same time.
• Disabling the 32kHz sample rate isn’t mandatory, but it might help in general.
Configuring for macOS (10.14 and later) The security settings in macOS (10.14 and later) may result in no input signal reaching your DAW, despite having everything set up correctly.
These steps apply when you are using the Orion 32HD in a DAW for the first time.
1. Launch your DAW and choose Orion 32HD as the input device. The following dialog box will appear (if using Ableton Live 10 Suite, for example):
2. Click 'OK' and your DAW should function normally.
However, if the events above did not occur for some reason, or you are using multiple
DAWs, you must do a manual tweak for each in 'Privacy & Security' settings:
1. Click the 'Apple' symbol and choose 'System Preferences'. Head to the 'Privacy & Security'
settings menu.
2. Make sure there's a checkmark next to any DAW you want to use.
Note: You may have to click the padlock symbol in the bottom left corner and enter your
password to make changes.
Please refer to thisPlaylist with video guidance on how to setup your Antelope Audio interface.
DAW setup with Antelope Devices
This guide shows how to setup your DAW with your Antelope device
Please follow one of the videos below for your desired DAW:
Guide for ProTools
Guide for Ableton Live 10
Guide for Studio One
Guide for Logic Pro X
Guide for Cubase 10
Routing, Tracking and Monitoring
This video tutorial explains in depth how to route,track and monitor with Zen Tour Synergy Core, Orion Studio Synergy Core, Galaxy 32 Synergy Core, Galaxy 64 Synergy Core, Goliath HD Gen 3, Orion 32+ Gen3 and Orion 32HD Gen 3
Please note that the mandatory device activation procedure requires an active internet connection on your computer. Activating an Antelope Audio device offline is not possible. Your Discrete 4 must be activated online to work. This chapter contains the necessary instructions:
1. Connect the Discrete 4 to a Windows or macOS computer.
3. Log in to the Antelope Audio user area with your email and password. If you don't have an account, visit https://en.antelopeaudio.com/sign-up/ to create one.
4. Click on the "Activate New Device" button.
5. Click on "Discrete 4" from the device list.
6. Download and install the Antelope Launcher application for Windows or macOS.
7. Open the Antelope Launcher application and click on the "Log-in" button (marked with red below):
Enter the email and password you used to login into the Antelope Audio user area in the website and click "Log in".
8. Click on "Activate".
Note: The Orion 32+will be listed in the 'My Hardware' page of the Antelope Audio user area with its serial number and activation date
After online activation is complete, please update the Orion 32+ to the latest Bundle Version available from the Antelope Launcher. To do this, simply open Antelope Launcher, go to "Devices", click on "Manage Device" box (3rd one from left to right under your "DEVICE ID", select the "latest" Bundle Version from the dropdown menu and hit "Install".
After the update is complete, you can configuring your interface for Windows 10 for more optimized workflow.
1. Right-click the speaker icon in the system tray and choose "Open Sound settings".
2. Make sure the Discrete 4is chosen under "Output" and "Input"
Under "Output", the device should be listed as "Discrete 4 USB Audio Driver Playback". Note that this choice means you will only hear computer audio from the Discrete 4's monitor and headphone outputs. If you would like to use another audio device for playback (listening), choose that one instead.
Under "Input", the device should be listed as "Discrete 4USB Audio Driver Recording 1/2".
3. Select the device and click "Device Properties" under "Output" and then click to "Additional device properties".
Go to "Advanced" tab and make sure Default Format is set at the same sample rate as your DAW.
* If your DAW is at 48000kHz that would be 48kHz, 2 Channels, 24-bit.
* Make sure you have selected 2 channels for Windows Audio Output settings of Default Format
4. Go to the "Supported Formats" tab and place checkmarks next to all the available sample rates except 32kHz.
5. Enter the "Enhancements" tab and disable all enhancements.
6. Back in Sound settings, click "Device Properties"-> "Input" -> "Additional device properties" and select the same sample rates for "Default Format" in "Advanced" Tab.
After go to the "Enhancements" tab and disable all enhancements. Click "OK" to save the adjustments and close the window.
Tips:
If you are experiencing interruptions or failure when using your DAW and trying to playback audio from your OS (system audio like an audio file/YouTube video/Spotify) at the same time, make sure that the device sample rate matches the one of your DAW session.
In some cases, disabling the "Exclusive mode" functionality from the "Advanced" tabs might help when running multiple playback applications at the same time.
Disabling the 32kHz sample rate isn’t mandatory, but it might help in general.
For further instructions and optimization please refer to this guide:
The security settings in macOS (10.14 and later) may result in no input signal reaching your DAW, despite having everything set up correctly. These steps apply when you are using the Discrete 4 in a DAW for the first time.
1. Launch your DAW and choose "Orion 32+"as the input device. The following dialog box will appear (if using Ableton Live 10 Suite, for example):
2. Click "OK" and your DAW should function normally.
If the events above did not occur for some reason, or you are using multiple DAWs, you must manually adjust the settings for each in "Security & Privacy":
Click the "Apple" icon at the top-right corner of your display and choose "System Preferences". Head to the "Security & Privacy" settings menu. Then Click "Privacy" tab. In the column on the left, choose "Microphone". Make sure there is a checkmark next to any DAW you want to use.
You may have to click the padlock symbol in the bottom left corner and enter your password to make changes.
If you are using MacOS Big Sur, you would need to follow this guide to install the Antelope Unified driver correctly.
This video tutorial explains in depth how to route, track and monitor with Zen Tour Synergy Core, Orion Studio Synergy Core, Galaxy 32 Synergy Core, Galaxy 64 Synergy Core, Goliath HD Gen 3, Orion 32+ Gen.3 and Orion 32HD Gen.3 and all related legacy devices.
The activation of a Verge/Edge microphone is a mandatory process required to be completed once you receive your product. It is needed to validate your product warranty and to gain access to the microphone emulations. To activate your product, please make sure to follow the instructions listed. Bear in mind that internet connection is required for successful product activation.
Before continuing, please take notice that the Edge line of microphones is best suited to work with an Antelope Audio interface with Discrete preamps. This will present the following benefits to your workflow:
1. Onboard processing – you will be able to use the microphone emulations during real-time monitoring with zero CPU load.
2. Discrete preamp architecture – designed to complement the characteristics of the Edge microphones for better sonic quality during recording.
Bear in mind that redeeming the code for native use of the emulations – with and without Antelope Audio interface – requires an iLok (gen 2 or later) USB hardware dongle sold separately and the iLok License Manager software to manage the authorization. Having an iLok USB hardware dongle allows you to carry your microphone emulation licenses on a physical drive wherever you may be using them.
Step 1: Login/Create an Antelope Audio User Account
Open your internet browser and navigate to https://antelopeaudio.com/login/. Log-in to your Antelope Audio user account with your e-mail and password. If you don’t have an account, visit https://antelopeaudio.com/sign-up/ to create one – don’t forget to confirm your registration via the e-mail you have received.
Step 2: Edge Microphone Activation
Once you have logged in, click on My Account in the top right to access the user dashboard on https://antelopeaudio.com/.
Click on the Activate New Device button.
Choose your Edge microphone model from the device list. All modeling microphones in the current product line are under the section Modeling Mics and the original, and now legacy, Edge microphone is under the Legacy Devices section.
After selecting your device, enter the 13-digit serial number which you can find on a small sticker in the base of your microphone.
After confirming the activation of the device, it is time to download and install the Antelope Launcher. This is needed to pair the microphone emulations with an Antelope Audio interface and download them as native effects. The following screen will appear.
Download the Antelope Launcher for macOS or Windows. After installing the Launcher application, open it and click on the Login button. Enter the e-mail and password you used to log in into the Antelope Audio My Account area and click Login.
Important: Before starting the processes of pairing the microphone emulations, switch off your monitor speakers and any other peripherals from your interface as a safety precaution.
The microphone emulations can be paired with a single audio interface at a time. If you are an owner of multiple Antelope Audio devices, select the one you want to pair the emulations with and click on Manage Device.
In the Antelope Registration Wizard window, choose Activate device or assign features and click Continue.
In the subsequent window, place a checkmark next to Edge Microphone Emulations and click Continue.
This will pair the microphone emulations with the audio interface which will allow you to apply them in real-time with near zero latency from the Control Panel of your interface. Click Done and the pairing is finished.
Step 4: Redeem the Code for the Native Microphone Emulations
If you want to use the microphone emulations as native effects in your DAW and for all users without Antelope Audio interface, you will require iLok (gen. 2 or later) hardware dongle. To do this, visit www.ilok.com and download and install the iLok Licence Manager Software. Insert the hardware dongle into a USB port on your computer and launch the iLok License Manager Software. Click Sign In or the small symbol shown below, and enter your account credentials – if you do not have an account, you will be required to create one from www.ilok.com.
Click Licenses > Redeem Activation Code in the top left corner.
You will be required to enter the iLok code for the native microphone emulations pack. You can find it in the My Software section of your www.antelopeaudio.com user account dashboard. Navigate to the emulations pack, and click Download DAW effect.
Copy the code, and paste in the iLok application.
Step 5: Installing the Native Mic Emulations on Your Computer
Start the Antelope Launcher and navigate to the Plug-Ins tab. Select your Edge microphone, place a checkmark in the empty field and press Update in the bottom left corner. This will install the latest version of the software that come with your microphone.
In the following screen, you have the option to install the 32-bit plugins. Select your desirable format, choose a location and press Done.
System Requirements
Mac:
• Minimum: Mac OS X 10.12 Sierra. Recommended: Mac OS X 11.02 Big Sur • Available storage space (Minimum 4 GB) • Memory (RAM): 4 GB minimum (8 GB or more recommended)
Windows:
• Windows 10 (64-bit) with latest Microsoft Updates • Available storage space (Minimum 4 GB) • Memory (RAM): 4 GB minimum (8 GB or more recommended) • CPU: Intel Core i3™ or AMD FX (Higher recommended)
Additional Information:
• iLok (gen 2 or later) USB hardware dongle is required to for native use of the emulations • Stable Internet connection is required to download and update your Antelope Audio Software